Vercel, GraphQL Apollo 서버 및 React 쌓기
소개
Vercel을 사용하면 React 단일 페이지 애플리케이션을 원활하게 배포할 수 있습니다. 그러나 serverless functions을 사용하면 Vercel에서 Apollo 서버를 사용하여 GraphQL API를 호스팅하는 것이 덜 간단합니다. 이 Linux용 작업 예제는 수행 방법을 보여줍니다. 이전Oh-so minimal GraphQL API example with Apollo Server 튜토리얼에서 코드를 차용했습니다.
모든 코드는 github 내vercel-apollo-server-react 저장소에서 찾을 수 있습니다. 데모의 최종 결과는 vercel-apollo-server-react.preciouschicken.vercel.app의 Vercel에서도 호스팅됩니다.
Create-React-App
시작하려면:
npx create-react-app vercel-apollo-server-react
cd vercel-apollo-server-react
npm i apollo-server-micro @apollo/client
GraphQL 서버
Vercel은 서버리스 기능이 api라는 폴더에 있을 것으로 예상하므로 먼저 다음을 만듭니다.
mkdir api
이 폴더에는 세 개의 파일이 필요합니다. 서버에서 사용할 일부 데이터, 데이터 구조를 설명하는 스키마 및 Apollo 서버 자체의 인스턴스입니다.
자료
이것은 데모일 뿐이므로 JSON 파일을 사용하여 데이터 저장소 역할을 할 것입니다(데이터 콘텐츠의 경우 - There Was an Old Lady Who Swallowed a Fly에서 영감을 얻었습니다). api/db.json 파일을 만들고 다음을 붙여넣습니다.
{
  "beasts": [
    {
        "id": "md",
        "legs": 6,
        "binomial": "Musca domestica",
        "commonName": "housefly"
    },
    {
        "id": "nr",
        "legs": 8,
        "binomial": "Neriene radiata",
        "commonName": "filmy dome spider"
    },
    {
        "id": "cc",
        "legs": 2,
        "binomial": "Corvus corone",
        "commonName": "carrion crow"
    },
    {
        "id": "fc",
        "legs": 4,
        "binomial": "Felis catus",
        "commonName": "cat"
    }
  ]
}
스키마
api/schema.js를 생성하고 다음과 같은 매우 기본적인 스키마를 붙여넣습니다(자세한 스키마는 my previous tutorial 참조).
import { gql } from 'apollo-server-micro';
import db from './db.json';

// The statements within quotes are used by GraphQL to provide
// human readable descriptions to developers using the API
export const typeDefs = gql`
    type Beast {
        "ID of beast (taken from binomial initial)"
        id: ID
        "number of legs beast has"
        legs: Int
        "a beast's name in Latin"
        binomial: String
        "a beast's name to you and I"
        commonName: String
    }

    type Query {
        beasts: [Beast]
    }
`
export const resolvers = {
    Query: {
        // Returns array of all beasts.
        beasts: () => db.beasts,
    }
}
아폴로 서버
Apollo 서버 자체를 인스턴스화하는 서버리스 함수는 다음과 같이 api/graphql.js에 붙여넣어야 합니다.
import { ApolloServer, makeExecutableSchema } from 'apollo-server-micro'
import { typeDefs, resolvers  } from './schema';

export default new ApolloServer({
    typeDefs,
    resolvers,
    introspection: true,
    playground: true,
}).createHandler({
    path: '/api/graphql',
})
introspection 및 playground 변수는 일반적으로 프로덕션에서 제외되지만 그대로 두는 것은 GraphQL 플레이그라운드에 계속 액세스할 수 있음을 의미합니다.프런트 엔드
API가 완료되었으므로 이제 src 폴더 내에서 React 요소를 편집해야 합니다. src/index.js의 내용을 삭제하고 다음으로 바꿉니다.
import React from 'react';
import ReactDOM from 'react-dom';
import './index.css';
import App from './App';
import { createHttpLink, ApolloProvider, ApolloClient, InMemoryCache } from '@apollo/client';
const client = new ApolloClient({
  cache: new InMemoryCache(),
  link: createHttpLink({ uri: "/api/graphql" }),
});

ReactDOM.render(
  <React.StrictMode>
    <ApolloProvider client={client}>
      <App />
    </ApolloProvider>
  </React.StrictMode>,
  document.getElementById('root')
);
마지막으로 src/App.js의 내용을 삭제하고 다음으로 바꿉니다.
import React from 'react';
import { gql, useQuery } from '@apollo/client';
import './App.css';

function App() {

  const GET_BEASTS = gql`
  query {
    beasts {
      id
      commonName
      legs
      binomial
    }
  }`;

  const { loading, error, data } = useQuery(GET_BEASTS);
  if (loading) return <p>Loading...</p>;
  if (error) return <p>Error</p>;
  return (
    <div className="App">
      <header className="App-header">
        <h1>Stacking Vercel, a GraphQL Apollo Server and React</h1>
        <p>A table of animals eaten by an old woman:</p>
        <table>
          <thead>
            <tr>
              <th>Name</th>
              <th>Legs</th>
              <th>Binomial</th>
            </tr>
          </thead>
          <tbody>
            {data.beasts.map(beast =>
            <tr key={beast.id}>
              <td>{beast.commonName}</td>
              <td>{beast.legs}</td>
              <td>{beast.binomial}</td>
            </tr>
            )}
          </tbody>
        </table>
        <small>
          <p>This is a demo page to accompany the tutorial <br/>
            <a className="App-link"
              href="https://www.preciouschicken.com/blog/posts/vercel-apollo-server-react">
              preciouschicken.com/blog/posts/vercel-apollo-server-react
            </a></p>
          <p>Consult your own physicican before eating any of the animals on this table.</p>
        </small>
      </header>
    </div>
  );
}

export default App;
Vercel에 업로드
Vercel에 업로드하는 방법에는 여러 가지가 있습니다. 저는 일반적으로 Github 리포지토리 통합을 사용하지만 이 과정에서는 CLI 옵션을 사용하겠습니다. 이것은 물론 귀하가 이미 Vercel에 가입했다고 가정합니다. 루트 디렉토리 로그인에 있는지 확인:
npx vercel login
이 시점에서 Vercel에 가입하는 데 사용된 주소를 입력해야 합니다. 확인 이메일이 전송되고 확인되면 터미널에서 확인됩니다. 완료되면 다음을 업로드합니다.
npx vercel --prod
모든 기본 옵션을 수락하고 업로드되면 Vercel에서 올바르게 빌드되었는지 확인하고 애플리케이션의 URL을 제공합니다. 모든 것이 제대로 된 경우 링크를 따라가면 다음과 같은 페이지로 이동합니다.
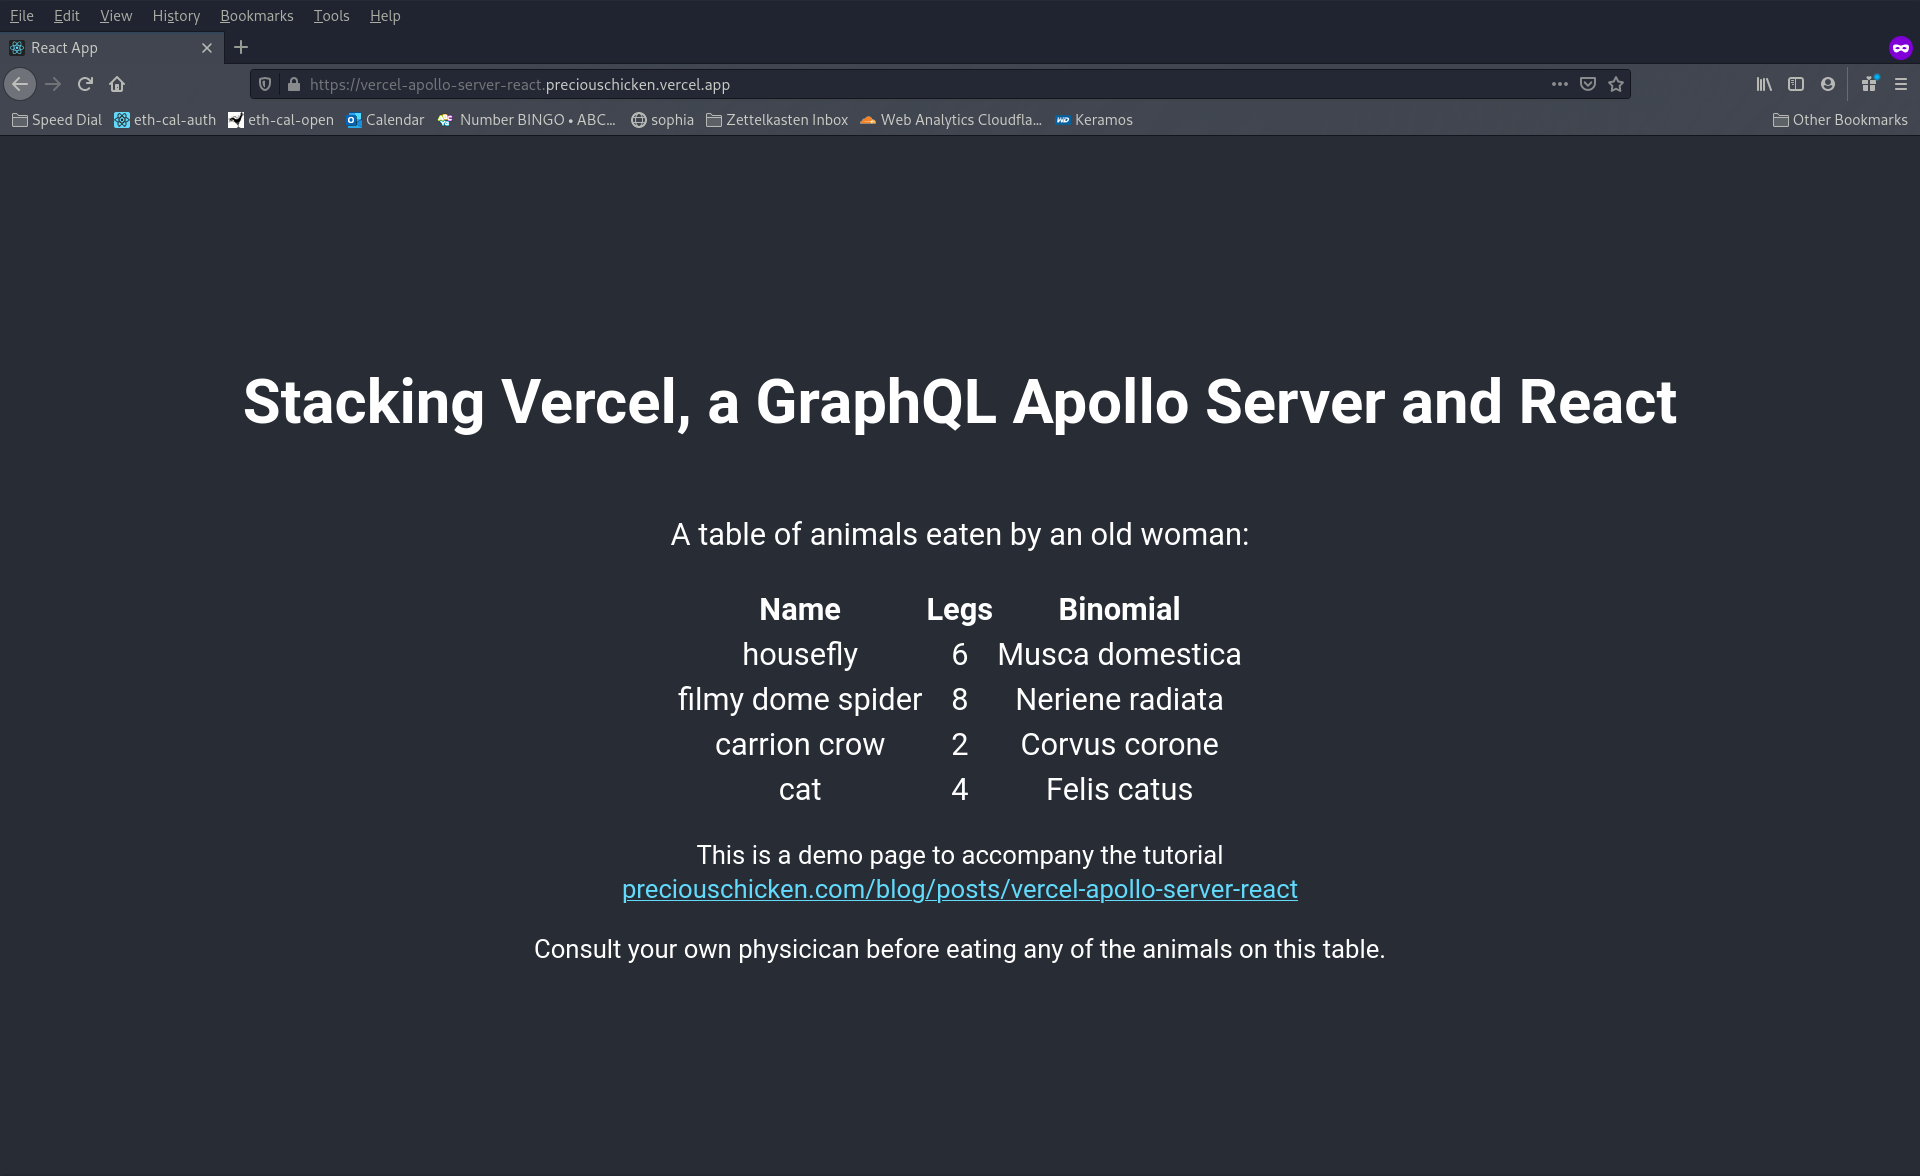
위의 라이브 버전은 Vercelvercel-apollo-server-react.preciouschicken.vercel.app에서 볼 수 있습니다.
웹에 업로드하지 않고 개발 목적으로 로컬 시스템에서 이를 실행하려는 경우 서버리스 기능으로 인해 실행
npm start이 작동하지 않는다는 점에 유의해야 합니다. 대신 다음을 사용하십시오.npx vercel dev
결론
이 내용이 유용했거나 피드백이 있는 경우 아래에 의견을 남겨주세요. GraphQL에서 생성한 다른 리소스는 다음과 같습니다.
Oh-so minimal GraphQL API example with Apollo Server - GraphQL API에 대한 보다 포괄적인 자습서입니다.
A no jokes guide to testing a GraphQL API with Jest - GraphQL API 테스트에 대한 작업 예제입니다.
버전 제어
이 예에서는 Vercel CLI 21.1.0, 노드 v15.2.0, npm v6.14.11, @apollo/client v3.3.6, apollo-server-micro v2.19.1 및 Ubuntu 20.04.1(Regolith 플레이버)을 사용합니다. 지침을 따라도 처음에 작동하지 않으면 이것이 문제일 수 있습니다. repo을 복제하여 시작하고
npm i && npx vercel dev를 실행해 보십시오(Vercel 로그온이 있다고 가정).
Reference
이 문제에 관하여(Vercel, GraphQL Apollo 서버 및 React 쌓기), 우리는 이곳에서 더 많은 자료를 발견하고 링크를 클릭하여 보았다 https://dev.to/preciouschicken/stacking-vercel-a-graphql-apollo-server-and-react-2l55텍스트를 자유롭게 공유하거나 복사할 수 있습니다.하지만 이 문서의 URL은 참조 URL로 남겨 두십시오.
![]() 우수한 개발자 콘텐츠 발견에 전념
(Collection and Share based on the CC Protocol.)
우수한 개발자 콘텐츠 발견에 전념
(Collection and Share based on the CC Protocol.)
좋은 웹페이지 즐겨찾기
