flutter를 시작했기 때문에 우선 bottomNavigationBar 붙여 보자
18368 단어 BottomNavigationBarDartFlutter
목표
flutter를 사용하여 앱 개발을 시작합니다! 그래서 자신의 공부의 메모로 이번에는 응용 프로그램에서 잘 본다
화면 하단의 네비게이션 bottomNavigationBar를 붙여 보려고합니다.

운영 환경
flutter의 환경 구축이 끝나지 않는다고 하는 분은 이하 기사를 참고로 해 주세요.
Install - Flutter
Mac에서 Flutter 개발 환경을 구축하는 단계
설치 | Flutter Doc KR
하단 네비게이션 만들기
BottomNavigationBar class
우선 화면 전환 이전에 화면 상태를 변경합시다.
이하 공식으로부터의 완성된 코드입니다
main.dart
// Flutter code sample for BottomNavigationBar
// This example shows a [BottomNavigationBar] as it is used within a [Scaffold]
// widget. The [BottomNavigationBar] has three [BottomNavigationBarItem]
// widgets and the [currentIndex] is set to index 0. The selected item is
// amber. The `_onItemTapped` function changes the selected item's index
// and displays a corresponding message in the center of the [Scaffold].
//
// 
import 'package:flutter/material.dart';
void main() => runApp(MyApp());
/// This Widget is the main application widget.
class MyApp extends StatelessWidget {
static const String _title = 'Flutter Code Sample';
@override
Widget build(BuildContext context) {
return MaterialApp(
title: _title,
home: MyStatefulWidget(),
);
}
}
class MyStatefulWidget extends StatefulWidget {
MyStatefulWidget({Key key}) : super(key: key);
@override
_MyStatefulWidgetState createState() => _MyStatefulWidgetState();
}
class _MyStatefulWidgetState extends State<MyStatefulWidget> {
int _selectedIndex = 0;
static const TextStyle optionStyle =
TextStyle(fontSize: 30, fontWeight: FontWeight.bold);
static const List<Widget> _widgetOptions = <Widget>[
Text(
'Index 0: Home',
style: optionStyle,
),
Text(
'Index 1: Business',
style: optionStyle,
),
Text(
'Index 2: School',
style: optionStyle,
),
];
void _onItemTapped(int index) {
setState(() {
_selectedIndex = index;
});
}
@override
Widget build(BuildContext context) {
return Scaffold(
appBar: AppBar(
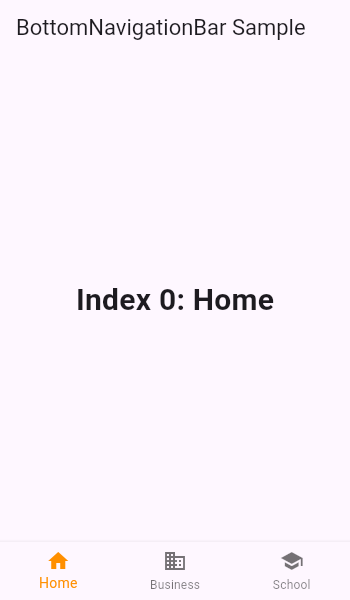
title: const Text('BottomNavigationBar Sample'),
),
body: Center(
child: _widgetOptions.elementAt(_selectedIndex),
),
bottomNavigationBar: BottomNavigationBar(
items: const <BottomNavigationBarItem>[
BottomNavigationBarItem(
icon: Icon(Icons.home),
title: Text('Home'),
),
BottomNavigationBarItem(
icon: Icon(Icons.business),
title: Text('Business'),
),
BottomNavigationBarItem(
icon: Icon(Icons.school),
title: Text('School'),
),
],
currentIndex: _selectedIndex,
selectedItemColor: Colors.amber[800],
onTap: _onItemTapped,
),
);
}
}
부분적으로 보기
@override
Widget build(BuildContext context) {
return Scaffold(
appBar: AppBar(
title: const Text('BottomNavigationBar Sample'),
),
body: Center(
child: _widgetOptions.elementAt(_selectedIndex),
),
bottomNavigationBar: BottomNavigationBar(
items: const <BottomNavigationBarItem>[
BottomNavigationBarItem(
icon: Icon(Icons.home),
title: Text('Home'),
),
BottomNavigationBarItem(
icon: Icon(Icons.business),
title: Text('Business'),
),
BottomNavigationBarItem(
 icon: Icon(Icons.school),
 title: Text('School'),
),
],
currentIndex: _selectedIndex,
selectedItemColor: Colors.amber[800],
onTap: _onItemTapped,
),
);
}
BottomNavigationBarItem
BottomNavigationBarItem(
icon: Icon(Icons.school),
title: Text('School'),
),
icon은 탐색 아이콘이고 제목은 아이콘 아래의 제목입니다.
icon은 다음 페이지에서 찾아 변경할 수 있습니다.
currentIndex , selectedItemColor, onTap
currentIndex: _selectedIndex,
selectedItemColor: Colors.amber[800],
onTap: _onItemTapped,
onTap은 내비게이션 버튼을 누르면 _onItemTapped가 움직입니다.
  void _onItemTapped(int index) {
    setState(() {
      _selectedIndex = index;
    });
  }
_onItemTapped로 누른 버튼이 몇 번째 index를 전달합니다.
setState에서 _selectedIndex로 설정합니다.
그러면 currentIndex에 반영되어 내비게이션의 현재 위치가 바뀝니다.
currentIndex: _selectedIndex,

↓

_selectedIndex 가 바뀌면 body 내용도 바뀝니다.
body: Center(
        child: _widgetOptions.elementAt(_selectedIndex),
      ),
_widgetOptions에는 다음 내용이 설정되어 있으므로 네비게이션을 눌렀을 때 각각에 따른 내용이 나옵니다.
static const List<Widget> _widgetOptions = <Widget>[
    Text(
      'Index 0: Home',
      style: optionStyle,
    ),
    Text(
      'Index 1: Business',
      style: optionStyle,
    ),
    Text(
      'Index 2: School',
      style: optionStyle,
    ),
  ];
selectedItemColor
네비게이션이 선택되었을 때의 색상을 지정합니다.
색상은 다음 URL에서 찾을 수 있습니다.
htps : // 아피. fぅ r. 로 v/fぅ는 r/마테리아 l/코ぉrs-cぁs. html #안녕 ts )
selectedItemColor: Colors.amber[800],
가볍게 만져보고 느낀 것
flutter에 관해서, 좋다고 생각한 점은
아직 조금 밖에 만지지 않은 상태에서 이렇게도 좋다고 생각되는 부분이 나왔기 때문에 두근두근 해 왔습니다.
앞으로도 몇 개 파트를 만들어 가서 최종적으로는 하나의 앱으로 해 나가려고 합니다.
flutter 자체의 기사도 조사하면 많이 정보 나오므로 곤란하지 않는 것도 좋네요.
공식 튜토리얼 도 있으므로 더 공부하고 싶습니다.
Reference
이 문제에 관하여(flutter를 시작했기 때문에 우선 bottomNavigationBar 붙여 보자), 우리는 이곳에서 더 많은 자료를 발견하고 링크를 클릭하여 보았다 https://qiita.com/takaHAL/items/e572dd5d4cb49d2e7675텍스트를 자유롭게 공유하거나 복사할 수 있습니다.하지만 이 문서의 URL은 참조 URL로 남겨 두십시오.
![]() 우수한 개발자 콘텐츠 발견에 전념
(Collection and Share based on the CC Protocol.)
우수한 개발자 콘텐츠 발견에 전념
(Collection and Share based on the CC Protocol.)
좋은 웹페이지 즐겨찾기
