【Ionic】 PeerJS를 사용하여 P2P 영상 채팅 만들기
이 기사는 【Ionic】 PeerJS를 사용하여 P2P 채팅 앱 만들기의 응용 프로그램입니다.
했던 일
PeerJS를 사용하여 P2P 영상 채팅을 할 수 있는 앱을 Ionic에서 만들었습니다.
Ionic으로 피어 만들기
베이스는 【Ionic】 PeerJS를 사용하여 P2P 채팅 앱 만들기 그래서,
도입부의 설명은 생략합니다.
동영상의 표시 영역 만들기
<ion-row>
  <ion-col>
    <video #video autoplay></video>
  </ion-col>
  <ion-col>
    <video #selfVideo autoplay></video>
  </ion-col>
</ion-row>
Angular가 ViewChild를 사용하여 제어할 수 있도록 합니다.
@ViewChild('video') video: any;
@ViewChild('selfVideo') selfVideo: any;

// 相手のビデオを表示する
private showVideo(stream) {
  let video = this.video.nativeElement;
  video.src = URL.createObjectURL(stream);
}

// 自分のビデオを表示する
private showVideoSelf(stream) {
  let video = this.selfVideo.nativeElement;
  video.src = URL.createObjectURL(stream);
}
통신 처리
다른 피어로부터 접속을 받았을 때의 처리와,
자신으로부터 접속해 갈 때의 처리를 준비합니다.
초기 셋업과 다른 피어로부터 접속을 받았을 때의 처리의 개시는,
Ionic의 ionViewDidLoad로 시작합니다.
ionViewDidLoad() {
  this.start();
}

// 初期セットアップ
public start() {
  const peerId = String(Math.floor(Math.random() * 900) + 100);
  const options = {
    host: location.hostname,
    port: 9000
  };

  this.peer = new Peer(peerId, options);

  this.peer.on('open', id => this.talk.srcId = id);

  this.peer.on('call', (call) => { this.receive(call); });
}

// 他の端末から接続をけた時の処理
private receive(call: PeerJs.MediaConnection) {
  navigator.getUserMedia =  ( navigator.getUserMedia || navigator.webkitGetUserMedia || navigator.mozGetUserMedia || navigator.msGetUserMedia );
  navigator.getUserMedia(this.talk.device, mediaStream => {
    this.showVideoSelf(mediaStream);
    call.answer(mediaStream);
    call.on('stream', stream => this.showVideo(stream));
  }, err => console.error(err));
}
버튼 이벤트를 받아 다른 피어에 접속하기 위한 처리를 준비합니다.
onSend() {
this.call();
}
// 他の端末へ接続しに行く
public call() {
navigator.getUserMedia = ( navigator.getUserMedia || navigator.webkitGetUserMedia || navigator.mozGetUserMedia || navigator.msGetUserMedia );
navigator.getUserMedia(this.talk.device, mediaStream => {
this.showVideoSelf(mediaStream);
const call = this.peer.call(this.talk.destId, mediaStream);
call.on('stream', stream => this.showVideo(stream));
}, err => console.error(err));
}
시그널링 서버
텍스트 채팅을 만들 때 준비한 것과 동일합니다.
var PeerServer = require('peer').PeerServer;
var server = new PeerServer({port: 9000});
테스트 실행
시그널링 서버
$ node peer.server.js
Ionic Server 실행
$ ionic serve
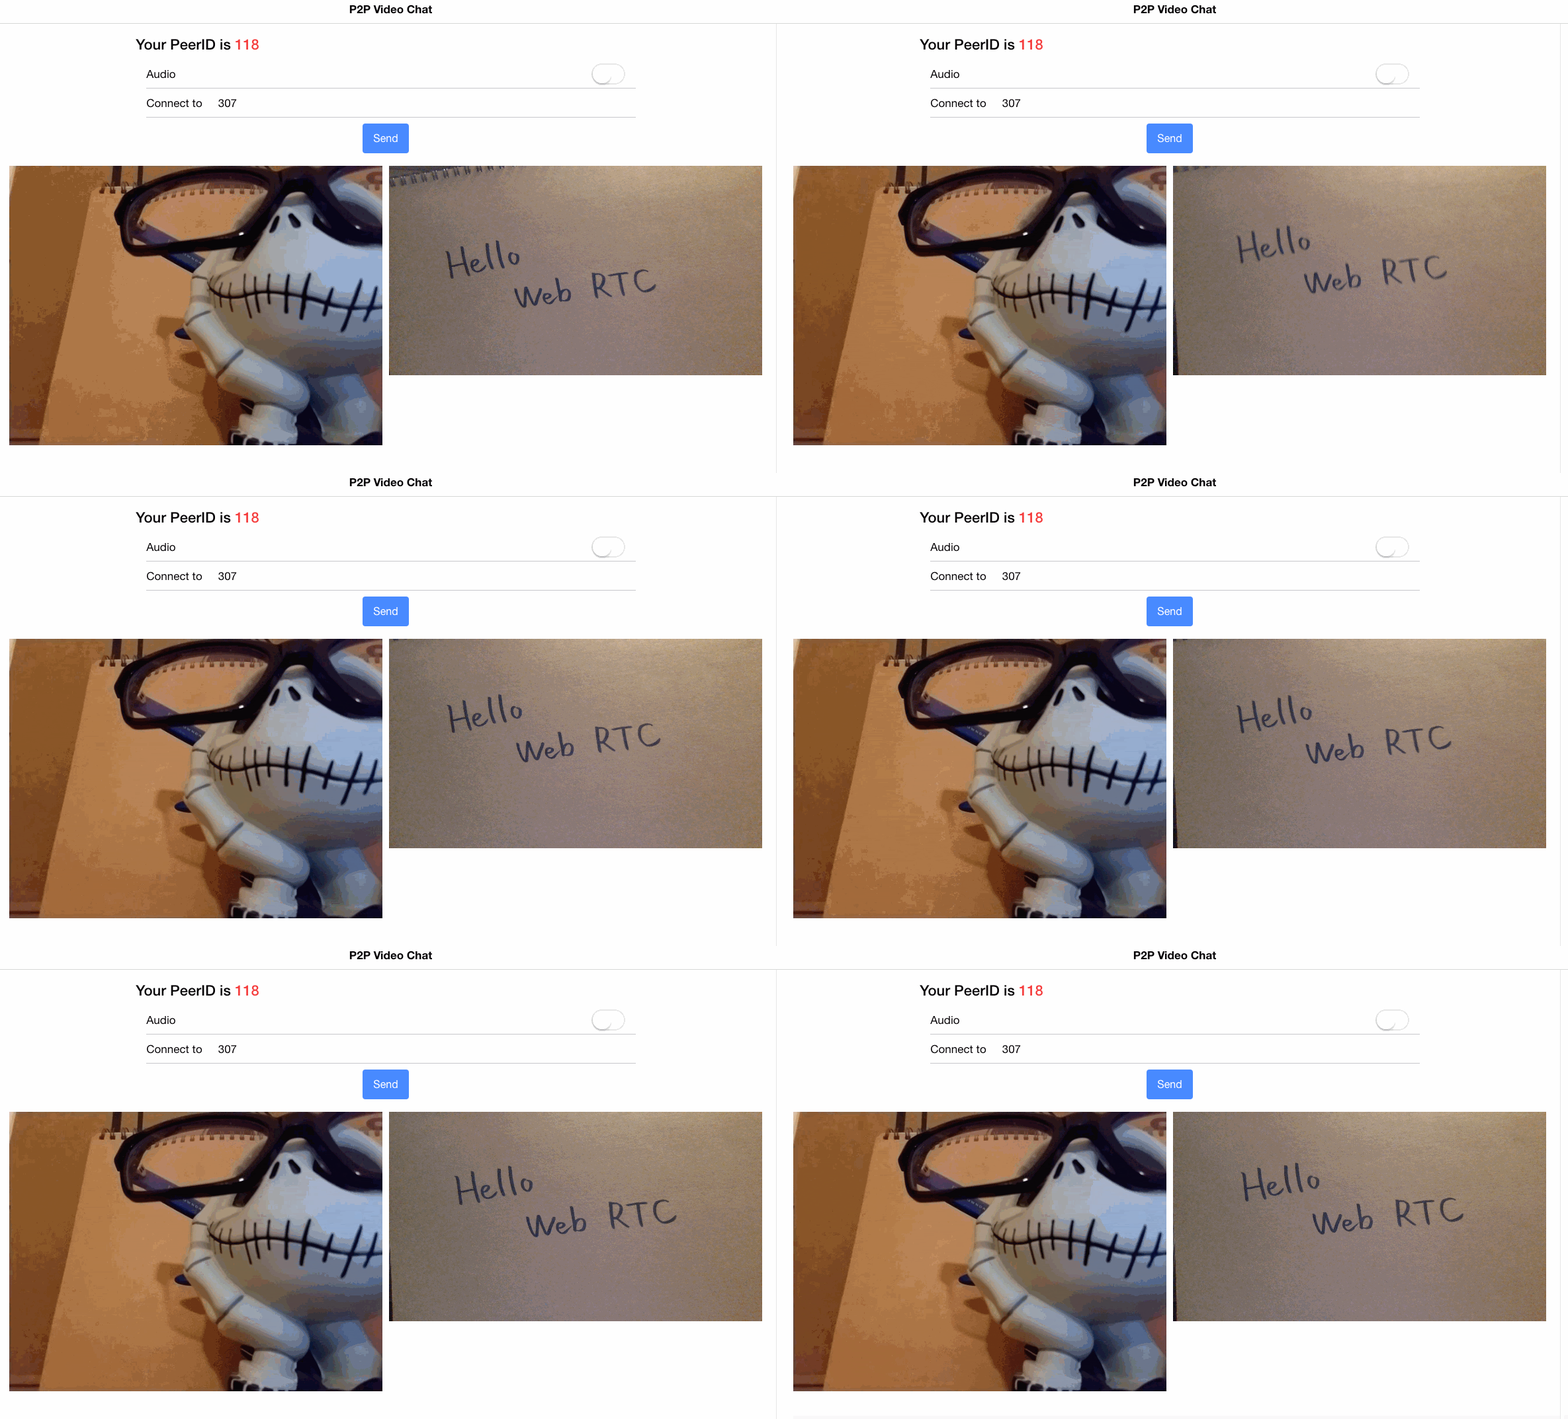
실행 이미지는 다음과 같습니다.

테스트 실행 시 주의사항
Chrome은 localhost 이외의 'getUserMedia'를 HTTPS에서만 사용할 수있었습니다.
localhost 이외(스마트폰 등)의 단말로 움직임을 확인하고 싶은 경우는,
Firefox 또는 Edge를 사용해야했습니다.
Safari는 localhost에서도 안되는 것 같습니다.
끝에
평상시 이런 느낌의 물건을 만들지 않기 때문에 움직이면 「오오!」라고 되었습니다.
실제 코드는 여기 GitHub입니다.
참고서적
HTML5/WebSocket/WebRTC로 TypeScript 네트워크 프로그래밍
Reference
이 문제에 관하여(【Ionic】 PeerJS를 사용하여 P2P 영상 채팅 만들기), 우리는 이곳에서 더 많은 자료를 발견하고 링크를 클릭하여 보았다 https://qiita.com/yosshitaku067/items/be0a8affc512352bcb00텍스트를 자유롭게 공유하거나 복사할 수 있습니다.하지만 이 문서의 URL은 참조 URL로 남겨 두십시오.

좋은 웹페이지 즐겨찾기
