WinForm 에서 Office 파일 을 미리 보 는 방법
WinForm,WPF,Office 구성 요소 사용 하기
원리:Office COM 구성 요 소 를 사용 하여 Word,Excel 을 XPS 문서 로 변환 하고 WPF 의 DocumentViewer 컨트롤 을 WinForm 에 저장 하여 미리 보기 합 니 다.
1.새 WinForm 프로젝트
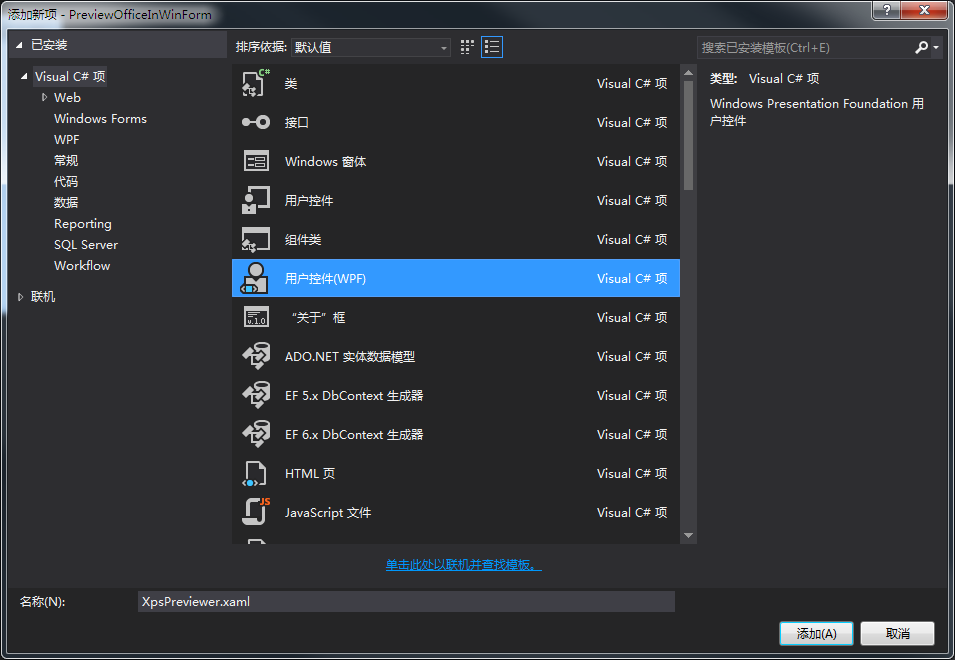
2.새 WPF 사용자 컨트롤,주의 WPF 컨트롤

3.WPF 사용자 컨트롤 편집
<UserControl ...
       ...>
  <Grid>
    <DocumentViewer x:Name="documentViewer"/>
  </Grid>
</UserControl>

자체 도구 모음 이 필요 하지 않 으 면 다음 자원 숨 김 도구 모음 을 추가 할 수 있 습 니 다.
<!--  DocumentViewer  -->
<UserControl.Resources>
  <Style x:Key="{x:Type DocumentViewer}" TargetType="{x:Type DocumentViewer}">
    <Setter Property="Foreground" Value="{DynamicResource {x:Static SystemColors.WindowTextBrushKey}}" />
    <Setter Property="Background" Value="{DynamicResource {x:Static SystemColors.ControlBrushKey}}" />
    <Setter Property="FocusVisualStyle" Value="{x:Null}" />
    <Setter Property="Template">
      <Setter.Value>
        <ControlTemplate TargetType="{x:Type DocumentViewer}">
          <Border BorderThickness="{TemplateBinding BorderThickness}" BorderBrush="{TemplateBinding BorderBrush}" Focusable="False">
            <Grid KeyboardNavigation.TabNavigation="Local">
              <Grid.Background>
                <SolidColorBrush Color="{DynamicResource ControlLightColor}" />
              </Grid.Background>
              <Grid.RowDefinitions>
                <RowDefinition Height="Auto" />
                <RowDefinition Height="*" />
                <RowDefinition Height="Auto" />
              </Grid.RowDefinitions>
              <ScrollViewer Grid.Row="1" CanContentScroll="true" HorizontalScrollBarVisibility="Auto" x:Name="PART_ContentHost" IsTabStop="true">
                <ScrollViewer.Background>
                  <LinearGradientBrush EndPoint="0.5,1" StartPoint="0.5,0">
                    <GradientStop Color="{DynamicResource ControlLightColor}" Offset="0" />
                    <GradientStop Color="{DynamicResource ControlMediumColor}" Offset="1" />
                  </LinearGradientBrush>
                </ScrollViewer.Background>
              </ScrollViewer>
            </Grid>
          </Border>
        </ControlTemplate>
      </Setter.Value>
    </Setter>
  </Style>
</UserControl.Resources>

WinForm 에 Element Host 추가

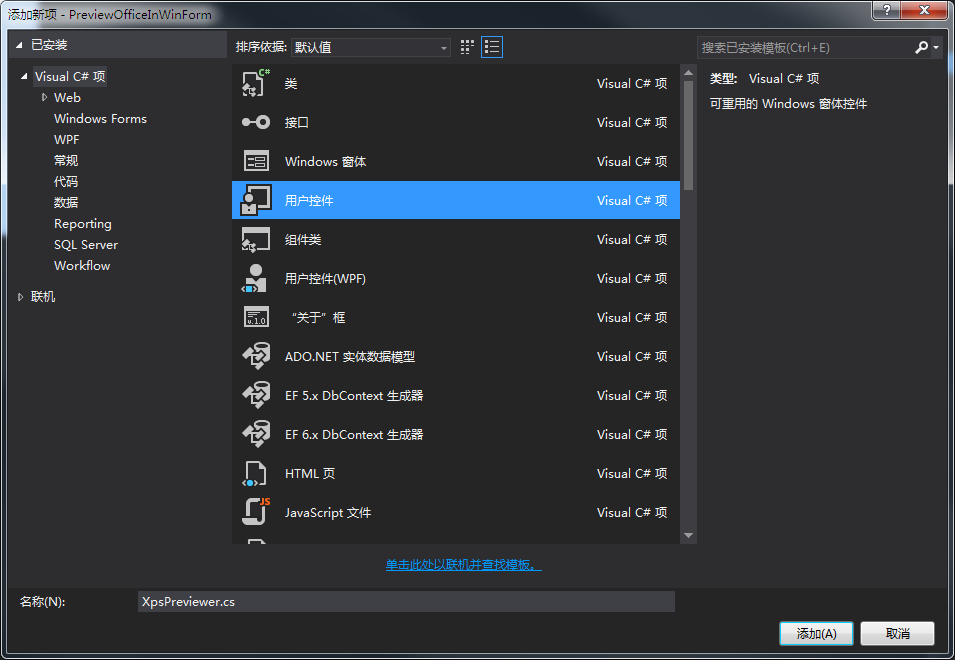
WPF 사용자 컨트롤 을 Element Host 에 추가 합 니 다.디자이너 코드 XpsPreviewer.Design.cs 는 다음 과 같 습 니 다.
  //ElementHost
  private System.Windows.Forms.Integration.ElementHost elementHost1;
  //XpsPreviewer
  private WPF.XpsPreviewer xpsPreviewer1;

  private void InitializeComponent()
  {
    this.elementHost1 = new System.Windows.Forms.Integration.ElementHost();
    this.xpsPreviewer1 = new WPF.XpsPreviewer();

    //
    //       ...
    this.elementHost1.Child = this.xpsPreviewer1;
    //       ...
  }
  /// <summary>
  ///   XPS
  /// </summary>
  /// <param name="fileName">XPS   </param>
  internal void LoadXps(string fileName)
  {
    var xpsDocument = new XpsDocument(fileName, FileAccess.Read);
    this.xpsPreviewer1.documentViewer.Document = xpsDocument.GetFixedDocumentSequence();
    xpsDocument.Close();
  }
Nuget 패키지 관리 콘 솔 을 통 해 COM 구성 요 소 를 설치 합 니 다.
PM> Install-Package Microsoft.Office.Interop.Excel
XPS 로 변환:
  /// <summary>
  ///  Excel     XPS
  /// </summary>
  /// <param name="execelFileName">Excel   </param>
  /// <param name="xpsFileName">   xps   </param>
  public void ConvertExcelToXps(string excelFileName, string xpsFileName)
  {
    if (string.IsNullOrWhiteSpace(excelFileName))
      throw new ArgumentNullException(excelFileName);
    if (string.IsNullOrWhiteSpace(xpsFileName))
      throw new ArgumentNullException(xpsFileName);

    var fileInfo = new FileInfo(xpsFileName);
    if (!fileInfo.Directory.Exists)
      fileInfo.Directory.Create();

    //
    if (File.Exists(xpsFileName))
      File.Delete(xpsFileName);

    Excel.Application app = new Excel.Application();
    app.DisplayAlerts = false;
    Excel.Workbooks wbs;
    Excel.Workbook wb;

    wbs = app.Workbooks;
    wb = wbs.Add(excelFileName);
    dynamic Nothing = System.Reflection.Missing.Value;
    wb.ExportAsFixedFormat(Excel.XlFixedFormatType.xlTypeXPS, xpsFileName, Nothing, Nothing, Nothing, Nothing, Nothing, Nothing, Nothing);
    wb.Close(true);
    wbs.Close();
    app.Quit();
    KillExcelProcess(app);
  }
  [DllImport("User32.dll")]
  private static extern int GetWindowThreadProcessId(IntPtr hWnd, out int ProcessId);

  /// <summary>
  ///   Excel
  /// </summary>
  /// <param name="obj"></param>
  private void KillExcelProcess(Excel.Application app)
  {
    if (app == null)
      return;
    try
    {
      IntPtr intptr = new IntPtr(app.Hwnd);
      int id;
      GetWindowThreadProcessId(intptr, out id);
      var p = Process.GetProcessById(id);
      p.Kill();
    }
    catch { }
  }
이상 이 바로 본 고의 모든 내용 입 니 다.여러분 의 학습 에 도움 이 되 고 저 희 를 많이 응원 해 주 셨 으 면 좋 겠 습 니 다.
이 내용에 흥미가 있습니까?
현재 기사가 여러분의 문제를 해결하지 못하는 경우 AI 엔진은 머신러닝 분석(스마트 모델이 방금 만들어져 부정확한 경우가 있을 수 있음)을 통해 가장 유사한 기사를 추천합니다:
WinForm Read Excel텍스트를 자유롭게 공유하거나 복사할 수 있습니다.하지만 이 문서의 URL은 참조 URL로 남겨 두십시오.
CC BY-SA 2.5, CC BY-SA 3.0 및 CC BY-SA 4.0에 따라 라이센스가 부여됩니다.
좋은 웹페이지 즐겨찾기
