React 앱 만들기: Webpack 및 Typescript로 별칭을 사용하여 모듈 가져오기
16763 단어 webpackreactwaveloptypescript
데모here를 살펴볼 수 있습니다.
Create React App을 사용하여 프로젝트 초기화
다음 명령을 실행합니다.
npx create-react-app cra-with-module-alias --template typescript
cd cra-with-module-alias
환경 설정 및 종속성 설치
실행하다:
npm run eject
아래 질문에
yes로 답하십시오.? Are you sure you want to eject? This action is permanent.
다음과 같은 구조를 갖게 됩니다.
cra-with-module-alias
├── README.md
├── node_modules
├── package.json
├── package-lock.json
├── .gitignore
├── config
│   ├── webpack.config.js
│   ├── ...
│   └── Other folder and files
├── scripts
│   ├── build.js
│   ├── start.js
│   └── test.js
├── public
│   ├── favicon.ico
│   ├── index.html
│   ├── logo192.png
│   ├── logo512.png
│   ├── manifest.json
│   └── robots.txt
└── src
    ├── App.css
    ├── App.tsx
    ├── App.test.tsx
    ├── index.css
    ├── index.tsx
    ├── logo.svg
    ├── react-app-env.d.ts
    ├── serviceWorker.ts
    └── setupTests.ts
종속성을 설치합니다.
npm i
아키텍처 폴더 생성
src 안에 다음 폴더를 만듭니다.
자산;
구성 요소;
페이지;
서비스.
이 모든 폴더 안에
index.ts 파일을 만듭니다.모든
index.ts 파일 내부에 포함된 하위 폴더를 내보낼 것입니다. 사용할 구문은 다음과 같습니다.export { default as ComponentName } from "./ComponentName/ComponentName";
상대 경로 대신 별칭을 사용하도록 Webpack 구성 업데이트
config/webpack.config.js 파일에 추가 - 특히 반환 개체의 resolve.alias 변수 - 다음 줄:
// config/webpack.config.js
...
module.exports = {
    ...
    resolve: {
      ...
      alias: {
        ...
        'Assets': path.resolve(__dirname, '../src/assets/'),
        'Components': path.resolve(__dirname, '../src/components/'),
        'Pages': path.resolve(__dirname, '../src/pages/'),
        'Services': path.resolve(__dirname, '../src/services/'),
      },
      ...
    },
    ...
};
이러한 방식으로 우리는 모든 구성 요소 내부에서 다음을 수행할 수 있습니다.
import { ComponentName } from 'Components';
import { ServiceName } from 'Services';
...
상대 경로 대신 별칭을 사용하도록 Typescript 구성 업데이트
앨리어싱을 사용하는 두 번째 단계는 Typescript 구성을 업데이트하는 것입니다. tsconfig.json 파일에 다음 줄을 추가합니다.
// tsconfig.json
{
  "compilerOptions": {
    ...
    "baseUrl": "./",
    "paths": {
      "Assets": [ "src/assets"],
      "Components": [ "src/components"],
      "Pages": [ "src/pages"],
      "Services": [ "src/services"],
    }
  },
  ...
}
이런 식으로 Typescript 컴파일러는 경로를 확인할 수 있습니다.
파일 재구성
이제
npm run eject 명령으로 생성된 파일을 재구성하겠습니다.자산 폴더에서 시작하여 logo.svg를 새 이미지 폴더로 이동합니다. 그리고 인덱스 파일 내에서 파일을 내보냅니다.
export { default as Logo } from './images/logo.svg';
이제 구성 요소의 경우 App.css, App.tsx 및 App.test.ts를 App이라는 새 폴더로 이동합니다.
App/App.tsx 파일 내에서
import logo from './logo.svg'; 의 가져오기 라인import { Logo as logo } from 'Assets';을 업데이트합니다.그리고 인덱스 파일 내에서 파일을 내보냅니다.
export { default as Logo } from './images/logo.svg';
결국 다음과 같이 업데이트
src/index.tsx해야 합니다.// src/index.js
import React from 'react';
import ReactDOM from 'react-dom';
import './index.css';
import { App } from 'Components'; // <-- New way to import Components
import * as serviceWorker from './serviceWorker';
ReactDOM.render(
<React.StrictMode>
<App />
</React.StrictMode>,
document.getElementById('root')
);
// If you want your app to work offline and load faster, you can change
// unregister() to register() below. Note this comes with some pitfalls.
// Learn more about service workers: https://bit.ly/CRA-PWA
serviceWorker.unregister();
Jest를 통해 테스트를 실행하기 위한 package.json의 구성 업데이트
별칭으로 모듈을 사용하여 테스트를 실행하려면 다음과 같이
package.json에서 jest 구성을 업데이트해야 합니다.// package.json
{
...
"jest": {
...
"moduleDirectories": [
".",
"src",
"node_modules"
],
"moduleNameMapper": {
...
"^Assets(.*)$": "<rootDir>/src/assets/$1",
"^Components(.*)$": "<rootDir>/src/components/$1",
"^Pages(.*)$": "<rootDir>/src/pages/$1",
"^Services(.*)$": "<rootDir>/src/services/$1"
},
}
}
Visual Studio 코드 팁
Visual Studio Code를 편집기로 사용하면
CTRL+Space를 사용하거나 조합을 사용하여 자동 완성을 통해 구성 요소 이름을 가져올 수 있습니다.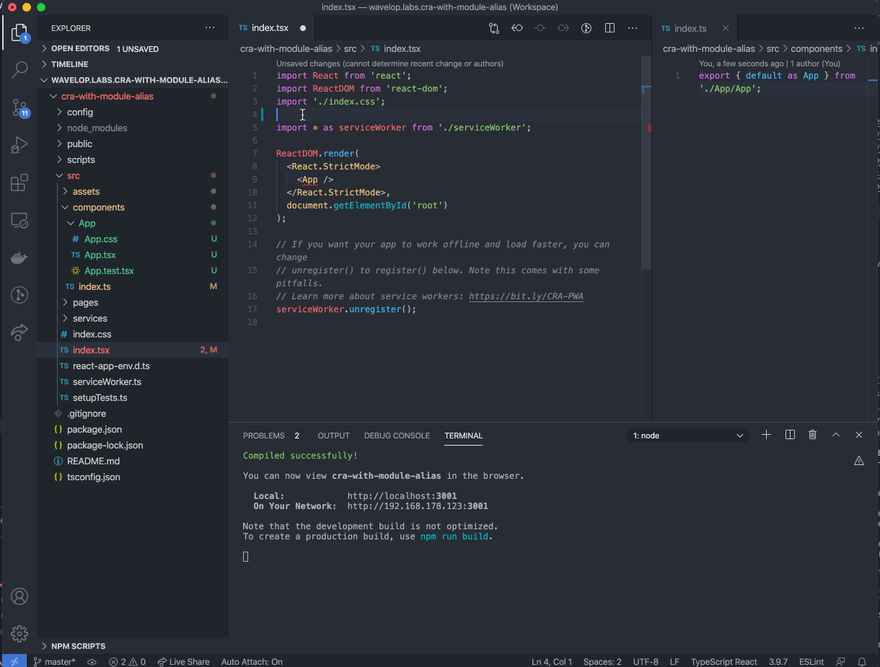
참조
결론
이러한 간단한 단계를 수행하면 상대 경로를 잊어버리고 변경 사항에 대해 폴더 구조를 보다 유연하게 만들 수 있습니다.
이 자습서here의 코드를 찾고 이PR에서 단계별 가이드를 따를 수 있습니다.
데모here를 살펴볼 수 있습니다.
질문이 있으시면 [email protected]으로 이메일을 보내주십시오.
2020년 8월 28일 https://wavelop.com/en/story/create-react-app-module-import-path-aliasing-with-webpack-typescript/에 처음 게시되었습니다.
학점
Light vector created by stories - www.freepik.com
Reference
이 문제에 관하여(React 앱 만들기: Webpack 및 Typescript로 별칭을 사용하여 모듈 가져오기), 우리는 이곳에서 더 많은 자료를 발견하고 링크를 클릭하여 보았다 https://dev.to/blundert/create-react-app-import-modules-using-aliases-with-webpack-and-typescript-49o0텍스트를 자유롭게 공유하거나 복사할 수 있습니다.하지만 이 문서의 URL은 참조 URL로 남겨 두십시오.
![]() 우수한 개발자 콘텐츠 발견에 전념
(Collection and Share based on the CC Protocol.)
우수한 개발자 콘텐츠 발견에 전념
(Collection and Share based on the CC Protocol.)
좋은 웹페이지 즐겨찾기
